Are you wondering how to install WordPress on Hostinger? Whether you’re a beginner or an experienced user, this step-by-step guide will make the process quick and straightforward. Hostinger is a popular choice for WordPress hosting, thanks to its affordability, performance, and user-friendly tools. In this post, we’ll walk you through everything you need to know to get your WordPress site up and running on Hostinger in no time. Let’s dive in!
Table of contents
- Why Choose Hostinger for WordPress?
- Prerequisites for Installing WordPress on Hostinger
- Step-by-Step Guide to Install WordPress on Hostinger
- Configuring WordPress After Installation
- Troubleshooting Common Installation Issues
- Alternative Methods to Install WordPress on Hostinger
- Benefits of Using WordPress with Hostinger
- FAQs About Installing WordPress on Hostinger
- Conclusion
Why Choose Hostinger for WordPress?
When it comes to hosting your WordPress website, Hostinger stands out as a top choice for several reasons. It combines affordability, performance, and user-friendly features, making it an ideal platform for both beginners and experienced users. Here’s why Hostinger is perfect for WordPress hosting:
1. Affordable Pricing Plans
Hostinger offers some of the most budget-friendly hosting plans on the market without compromising on quality. With plans starting as low as a few dollars per month, it’s an excellent choice for anyone looking to start a WordPress website on a tight budget.
2. Optimized for WordPress
Hostinger is built with WordPress in mind. It provides a seamless installation process, enhanced server performance, and tools specifically designed for WordPress users. Features like LiteSpeed caching and PHP 8.0 ensure your site runs quickly and efficiently.
3. User-Friendly Control Panel (hPanel)
Hostinger’s hPanel is intuitive and easy to navigate. It allows you to manage your website, domains, databases, and email accounts all in one place. Unlike traditional cPanels, hPanel is simplified, making it easier for beginners to understand and use.
4. Free Domain and SSL Certificate
Most Hostinger plans come with a free domain name and SSL certificate, saving you additional costs. An SSL certificate is essential for securing your site and improving your search engine rankings.
5. Fast Loading Speeds and Uptime
Hostinger ensures that your WordPress website loads quickly and stays online with a 99.9% uptime guarantee. This performance is critical for maintaining a positive user experience and boosting your site’s SEO rankings.
6. 24/7 Customer Support
Hostinger provides round-the-clock customer support via live chat. Their support team is knowledgeable about WordPress-specific issues and can guide you through any challenges you encounter.
7. One-Click WordPress Installation
With Hostinger’s one-click WordPress installer, getting started is incredibly simple. You don’t need any technical skills or coding knowledge to install WordPress and launch your site.
Prerequisites for Installing WordPress on Hostinger
Before you can dive into the step-by-step process of how to install WordPress on Hostinger, there are a few essential prerequisites you need to have in place. Ensuring you’re prepared will make the installation process smooth and hassle-free. Here’s what you’ll need:
1. A Hostinger Hosting Plan
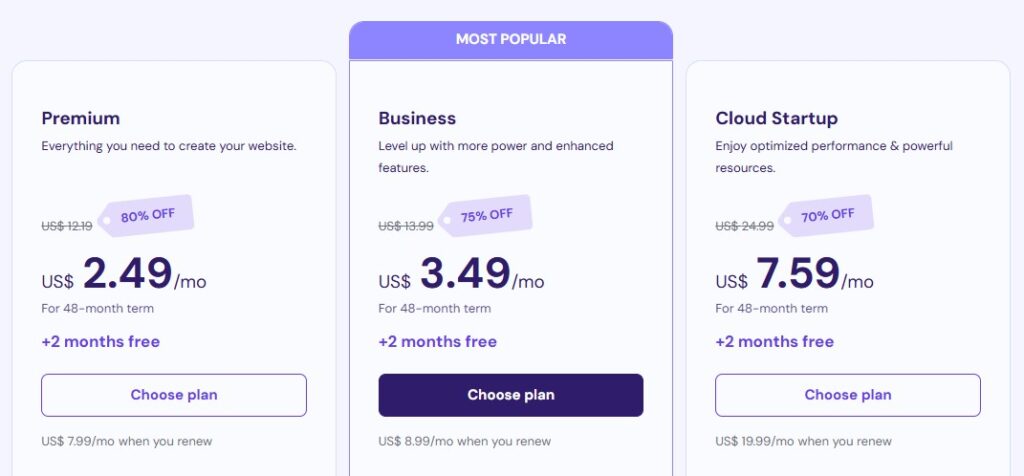
To install WordPress on Hostinger, the first thing you’ll need is an active hosting plan. Hostinger offers a range of plans tailored for WordPress users, including the Single, Premium, and Business hosting plans. Choose the one that best suits your needs and budget.
2. A Registered Domain Name
You’ll also need a domain name for your website. If you don’t already have one, you can register a domain directly through Hostinger. Many of their hosting plans include a free domain for the first year, which is a great perk for beginners.
3. Access to Hostinger’s hPanel
Hostinger uses its own custom control panel called hPanel. You’ll need to log in to your Hostinger account to access the tools required to install WordPress. The hPanel includes a 1-click WordPress installer, making the setup process fast and easy.
4. Website Details
To complete the installation process, you’ll need to provide some basic information for your WordPress site, including:
- Website Title: The name of your website or blog.
- Admin Email Address: This will be used for account recovery and notifications.
- Admin Username and Password: These credentials will allow you to log in to the WordPress admin dashboard.
5. An Internet Connection
Lastly, make sure you have a stable internet connection to access Hostinger’s control panel and complete the installation process without interruptions.
Optional: Preferred WordPress Theme
While this isn’t mandatory, it’s helpful to have a WordPress theme in mind before you start. Hostinger’s installation process allows you to select a starter theme, saving time later.
Step-by-Step Guide to Install WordPress on Hostinger
Installing WordPress on Hostinger is a quick and straightforward process, thanks to its user-friendly tools and 1-click WordPress installer. Follow this detailed guide to learn how to install WordPress on Hostinger step by step.
1. Log in to Hostinger’s Control Panel (hPanel)
After purchasing a hosting plan, log in to your Hostinger account. Once inside, you’ll be directed to the hPanel, Hostinger’s custom control panel.
2. Navigate to the Auto Installer
In the hPanel dashboard, scroll down to the Website section and click on the Auto Installer option. This is where you’ll find tools to install WordPress and other CMS platforms with just a few clicks.
3. Select WordPress
Once you’re in the Auto Installer section, you’ll see a list of available applications. Click on WordPress to begin the installation process.
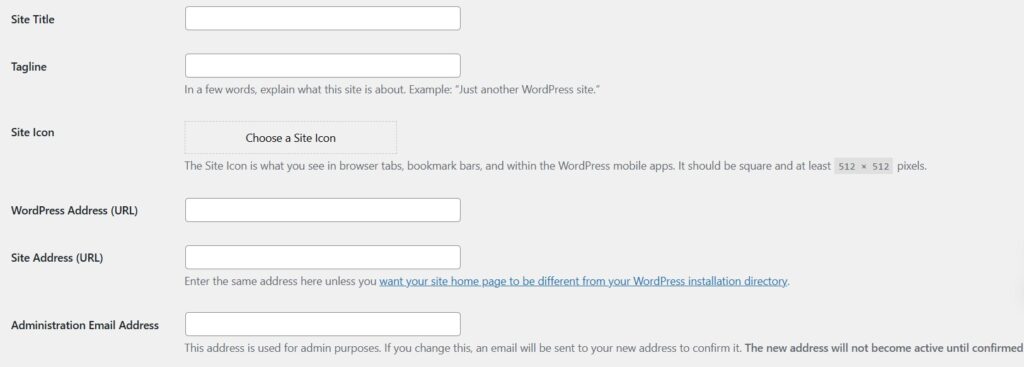
4. Fill in the Website Details
You’ll be prompted to provide essential details for your WordPress installation:
- Admin Email Address: This will be used for managing your WordPress account.
- Admin Username and Password: Create secure credentials to access the WordPress admin dashboard.
- Website Title: Enter the name of your site or blog.
5. Choose a WordPress Installation Location
Select the domain where you want to install WordPress. If you have multiple domains, make sure to choose the correct one from the dropdown menu. For a new website, leave the directory field blank to install WordPress in the root directory.

6. Choose Your Preferred Language and Settings
Hostinger allows you to select your preferred language for WordPress. You can also enable optional features like auto-updates for plugins and themes to keep your site secure and optimized.
7. Install a Starter Theme (Optional)
During the installation process, you’ll have the option to select a starter WordPress theme. While this step is optional, it can save time by pre-loading a design for your site.
8. Click “Install” to Finalize the Process
After completing the setup, click the Install button. Hostinger will automatically configure WordPress for you. Once the process is complete, you’ll see a confirmation message with a link to your WordPress admin dashboard.
9. Log in to Your WordPress Dashboard
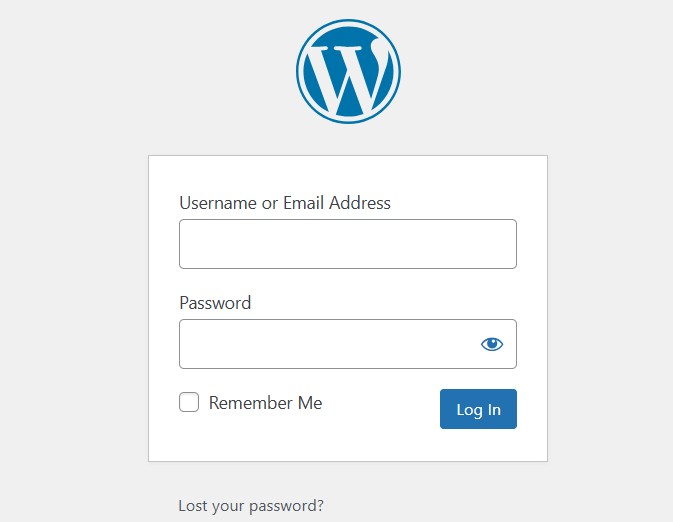
Click the link provided to log in to your WordPress admin dashboard. Use the admin username and password you created earlier. From here, you can start customizing your site, adding content, and installing plugins.
Configuring WordPress After Installation
Once you’ve completed how to install WordPress on Hostinger, the next crucial step is to configure your site for optimal performance and usability. Proper configuration ensures your site is secure, user-friendly, and ready to grow. Follow these steps to get your WordPress website set up after installation:
1. Set Up Permalinks
Permalinks determine the structure of your URLs. For better SEO and readability, it’s best to use the “Post Name” structure.
- Go to your WordPress dashboard.
- Navigate to Settings > Permalinks.
- Select the Post Name option and save changes.
2. Install Essential Plugins
Plugins extend the functionality of your WordPress site. Here are some must-have plugins:
- Yoast SEO or Rank Math: For search engine optimization.
- Akismet Anti-Spam: To protect your site from spam comments.
- WP Super Cache or W3 Total Cache: To improve site performance and loading speed.
- UpdraftPlus: For automated backups.
To install plugins:
- Go to Plugins > Add New in your dashboard.
- Search for the plugin, click Install Now, then Activate.
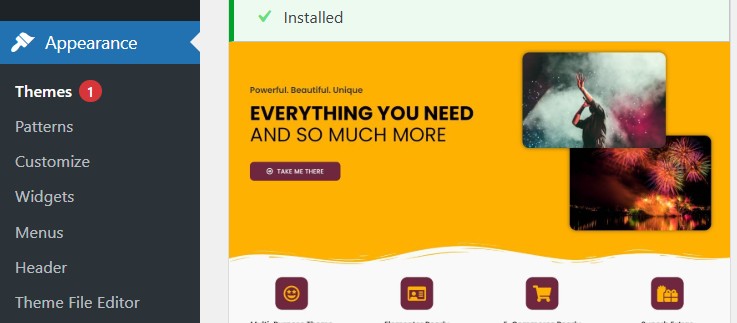
3. Choose and Customize a Theme
Your WordPress theme determines the design and layout of your website.
- Go to Appearance > Themes.
- Click Add New, browse available themes, and choose one that fits your needs.
- Once installed, click Customize to adjust colors, fonts, and other design elements.
4. Set Up a Site Title and Tagline
Your site title and tagline appear in search results and on your website header.
- Navigate to Settings > General.
- Enter your site title and tagline (e.g., “My WordPress Blog – Sharing Ideas with the World”).
- Save changes.
5. Secure Your Website with SSL
If you’ve chosen a Hostinger plan with a free SSL certificate, activate it to secure your site and improve SEO.
- Log in to your Hostinger hPanel.
- Navigate to SSL > Setup and enable the certificate for your domain.
6. Create Key Pages
Every website needs essential pages to provide information to visitors. Create the following pages:
- Home: The landing page for your site.
- About: Information about you or your business.
- Contact: A page with a form or email address for inquiries.
- Privacy Policy: A must-have for legal compliance.
To create pages:
- Go to Pages > Add New in your WordPress dashboard.
- Add content and publish.
7. Configure Basic Settings
Adjust a few important settings for your site:
- Time Zone: Go to Settings > General and set the correct time zone for accurate scheduling.
- Comment Moderation: In Settings > Discussion, enable moderation to prevent spam comments.
- Media Settings: Go to Settings > Media to define default image sizes.
8. Test Your Site
Before making your site public, test its functionality:
- Check how it looks on desktop, mobile, and tablet devices.
- Test links and buttons to ensure everything works as expected.
- Review your site’s speed using tools like Google PageSpeed Insights.
9. Enable Automatic Updates
To keep your site secure and up-to-date, enable automatic updates for WordPress core, themes, and plugins:
- Go to Dashboard > Updates.
- Enable automatic updates for all components.
Troubleshooting Common Installation Issues
While installing WordPress on Hostinger is generally straightforward, you might encounter some common issues during the process. Don’t worry—most of these problems have simple solutions. Here’s a guide to troubleshoot potential challenges when learning how to install WordPress on Hostinger.
1. Failed Installation Error
This issue often occurs if the system fails to complete the installation process.
S O L U T I O N:
- Ensure your internet connection is stable.
- Clear your browser cache and try again.
- Check that your hosting plan is active and correctly set up in Hostinger’s hPanel.
2. Database Connection Error
This error happens when WordPress cannot connect to the database due to incorrect credentials.
S O L U T I O N:
- Log in to Hostinger’s hPanel.
- Navigate to Databases > MySQL Databases and verify the database name, username, and password.
- Update these credentials in the wp-config.php file via File Manager.
3. “Directory Already Exists” Message
This error occurs if WordPress has already been installed or files are present in the target directory.
S O L U T I O N:
- Go to the File Manager in Hostinger’s hPanel.
- Delete the existing files in the directory or choose a new directory for installation.
4. Exceeded Memory Limit Error
You might encounter a memory limit error during installation if the default PHP memory is insufficient.
S O L U T I O N:
- Navigate to Advanced > PHP Configuration in hPanel.
- Increase the memory limit (e.g., set it to 256M) and save the changes.
5. HTTP Error During Installation
This issue can happen if your hosting server times out while processing the installation.
S O L U T I O N:
- Check your internet connection.
- Restart the installation process.
- Contact Hostinger support if the problem persists, as it might require server adjustments.
6. SSL Not Activated After Installation
If your site doesn’t load with HTTPS, the SSL certificate might not be activated.
S O L U T I O N:
- Log in to hPanel and go to SSL > Setup.
- Activate the SSL certificate for your domain.
- If HTTPS still doesn’t work, force it via WordPress settings or use a plugin like Really Simple SSL.
7. WordPress Login Issues
You might have trouble logging in to your WordPress admin dashboard after installation.
S O L U T I O N:
- Double-check the admin username and password you entered during installation.
- Reset your password by clicking “Lost your password?” on the login page.
8. White Screen of Death (WSOD)
The WSOD is a blank white screen that can appear after installation due to plugin or theme conflicts.
S O L U T I O N:
- Access your site via File Manager or an FTP client.
- Disable plugins by renaming the plugins folder in the wp-content directory.
- If the issue persists, switch to a default WordPress theme by renaming the current theme folder.
9. Incorrect File Permissions
Improper file permissions can prevent WordPress from working properly after installation.
S O L U T I O N:
- Log in to Hostinger’s hPanel.
- Navigate to File Manager, locate your WordPress directory, and set file permissions to 644 for files and 755 for directories.
10. Still Stuck? Contact Hostinger Support
If none of the above solutions resolve your issue, Hostinger’s 24/7 customer support is always available to help. Simply use the live chat option in hPanel to get professional assistance.
Alternative Methods to Install WordPress on Hostinger
While Hostinger’s 1-click installer is the easiest way to install WordPress, there are alternative methods you can use if you prefer more control or if specific situations require it. This guide will cover two popular alternatives for how to install WordPress on Hostinger: manual installation via FTP and importing an existing WordPress site.
1. Manual Installation via FTP
If you want full control over your WordPress installation or need to troubleshoot custom setups, manual installation via FTP is a reliable option.
Step-by-Step Guide:
- Download WordPress
- Visit the official WordPress.org website and download the latest WordPress version.
- Upload Files to Hostinger Using FTP
- Use an FTP client like FileZilla to connect to your Hostinger account. Enter your FTP credentials (found in Hostinger’s hPanel under Files > FTP Accounts). Upload the extracted WordPress files to the root directory (usually public_html) or a specific folder.
- Create a Database
- Log in to Hostinger’s hPanel and navigate to Databases > MySQL Databases. Create a new database, username, and password, and note down these details for later use.
- Configure wp-config.php
- Locate the wp-config-sample.php file in the WordPress folder you uploaded. Rename it to wp-config.php and update the database name, username, and password fields with the details you just created.
- Run the Installation Script
- Open your browser and navigate to your domain (e.g.,
yourdomain.com).Follow the on-screen instructions to complete the WordPress setup.
- Open your browser and navigate to your domain (e.g.,
2. Importing an Existing WordPress Site
If you already have a WordPress website hosted elsewhere, you can move it to Hostinger using these steps:
Step-by-Step Guide:
- Export Your Website from the Current Host
- Log in to your existing WordPress dashboard. Navigate to Tools > Export, and download the export file (XML) of your content.
- Upload Files to Hostinger
- Access Hostinger’s hPanel and use the File Manager to upload your WordPress files, or use an FTP client. Alternatively, use a plugin like All-in-One WP Migration to migrate the site.
- Import the Database
- Export your database from the old host using phpMyAdmin.Import it into Hostinger’s MySQL database via the hPanel.
- Update wp-config.php
- Edit the wp-config.php file to reflect the new database details.
- Point Your Domain to Hostinger
- Update your domain’s nameservers to point to Hostinger. This can be done in your domain registrar’s control panel.
3. Using Softaculous (if Available)
In some cases, hosting providers (including Hostinger on specific plans) offer Softaculous, a third-party app installer for WordPress.
- Log in to Hostinger’s hPanel.
- Navigate to Softaculous Apps Installer.
- Choose WordPress and follow the on-screen prompts to complete the installation.
Benefits of Using WordPress with Hostinger
Choosing WordPress as your website platform and Hostinger as your hosting provider is a winning combination. Hostinger offers an optimized environment for WordPress, ensuring smooth performance, reliability, and ease of use. Let’s explore the key benefits of using WordPress with Hostinger and why it’s a great choice for your website.
1. Fast and Reliable Performance
Hostinger is built for speed, offering servers optimized with LiteSpeed technology, HTTP/3, and SSD storage. These features ensure your WordPress site loads quickly, which improves user experience and search engine rankings.
2. Affordable Hosting Plans
Hostinger offers budget-friendly hosting plans tailored for WordPress users, with prices starting at just a few dollars per month. Even at these competitive rates, you get premium features like free SSL, a free domain, and 24/7 support.
3. One-Click WordPress Installation
Hostinger makes setting up WordPress incredibly easy with its 1-click installer. This feature eliminates the need for technical knowledge, allowing anyone to install WordPress in minutes.
4. User-Friendly hPanel
Unlike traditional cPanels, Hostinger’s custom hPanel is modern, intuitive, and easy to navigate. It provides all the tools you need to manage your WordPress site, such as domain settings, file manager, and performance optimizations.
5. Enhanced Security Features
Hostinger provides robust security measures to protect your WordPress site, including:
- Free SSL certificates to secure your site with HTTPS.
- Daily or weekly backups for data protection.
- Advanced DDoS protection and firewalls to safeguard your website from cyber threats.
6. Automatic WordPress Updates
Hostinger automatically updates your WordPress core, plugins, and themes to keep your site secure and running smoothly. This ensures you don’t miss critical updates that could affect performance or security.
7. Scalability for Growing Websites
Hostinger’s hosting plans are designed to grow with your website. Whether you’re running a small blog or a large e-commerce store, you can upgrade your hosting plan as your traffic and resource needs increase.
8. 24/7 Expert Customer Support
Hostinger provides 24/7 customer support via live chat, with a team of experts trained to handle WordPress-specific issues. Whether you’re dealing with installation problems or performance optimizations, help is always available.
9. Developer-Friendly Features
For advanced users, Hostinger offers features like SSH access, Git integration, and staging tools. These tools allow developers to customize and manage their WordPress sites more efficiently.
10. SEO and Performance Optimization
Hostinger’s WordPress hosting includes features like LiteSpeed Cache and support for PHP 8.0, which enhance site speed and performance. Faster sites rank higher on search engines, giving your WordPress site a competitive edge.
FAQs About Installing WordPress on Hostinger
If you’re new to WordPress or hosting, you might have questions about how to install WordPress on Hostinger. Here are answers to some frequently asked questions to help you through the process.
1. Is Hostinger good for WordPress beginners?
Yes, Hostinger is an excellent choice for WordPress beginners. Its user-friendly hPanel and 1-click WordPress installer make it easy to set up a website, even without technical experience.
2. What do I need before installing WordPress on Hostinger?
To install WordPress on Hostinger, you’ll need:
- A Hostinger hosting plan.
- A domain name (free with certain plans).
- Access to Hostinger’s hPanel.
For a detailed checklist, refer to the Prerequisites for Installing WordPress on Hostinger.
3. Can I transfer an existing WordPress site to Hostinger?
Yes, Hostinger makes it easy to migrate an existing WordPress site. You can use a plugin like All-in-One WP Migration or manually transfer files and databases via FTP and phpMyAdmin.
4. How long does it take to install WordPress on Hostinger?
Using Hostinger’s 1-click installer, you can install WordPress in under 5 minutes. Manual installation or migration might take a little longer, depending on your experience.
5. What should I do if I encounter errors during installation?
If you face issues during installation, check the following:
- Ensure your internet connection is stable.
- Verify that your hosting plan is active and your domain is set up correctly.
- Refer to our Troubleshooting Common Installation Issues guide for detailed solutions.
6. Is WordPress free to use on Hostinger?
Yes, WordPress is free to use, and Hostinger provides affordable hosting plans to run your WordPress site. Some premium plugins and themes may require additional costs, but the platform itself is free.
7. Can I install WordPress on multiple domains with Hostinger?
Yes, if your hosting plan supports multiple domains (such as Premium or Business plans), you can install WordPress on each domain using the 1-click installer in hPanel.
8. Do I get a free SSL certificate with WordPress hosting on Hostinger?
Yes, most Hostinger plans include a free SSL certificate, which you can activate via hPanel to secure your WordPress site with HTTPS.
9. Can I change my WordPress domain later?
Yes, you can change your domain name for a WordPress site hosted on Hostinger. After purchasing a new domain, update the domain settings in WordPress and Hostinger’s hPanel.
10. What support is available if I have installation problems?
Hostinger offers 24/7 customer support via live chat. Their support team is knowledgeable about WordPress and can assist with installation or troubleshooting.
Conclusion
Installing WordPress on Hostinger is a simple and beginner-friendly process, thanks to Hostinger’s user-focused tools and 1-click installer. Whether you’re creating a blog, launching an online store, or building a professional website, Hostinger provides everything you need for success: fast performance, affordability, and reliable support.
By following this guide, you’ve learned how to install WordPress on Hostinger, configure it for optimal performance, and address common issues. With WordPress’s flexibility and Hostinger’s powerful hosting, you’re now ready to build and grow your website.
Take the next step and start your WordPress journey with Hostinger today! Don’t wait—unlock the potential of your website with a hosting provider that’s designed to support your goals.
Ready to launch your WordPress website? Hostinger makes it easy, affordable, and hassle-free. With fast performance, reliable support, and powerful tools, it’s the perfect hosting solution for WordPress users.
Don’t wait—get started today!
- Choose your Hostinger hosting plan here.
- Follow this guide to install WordPress in minutes.
- Start building your dream website now!
Click below to begin your WordPress journey with Hostinger:

